User Guide for photogrammetry

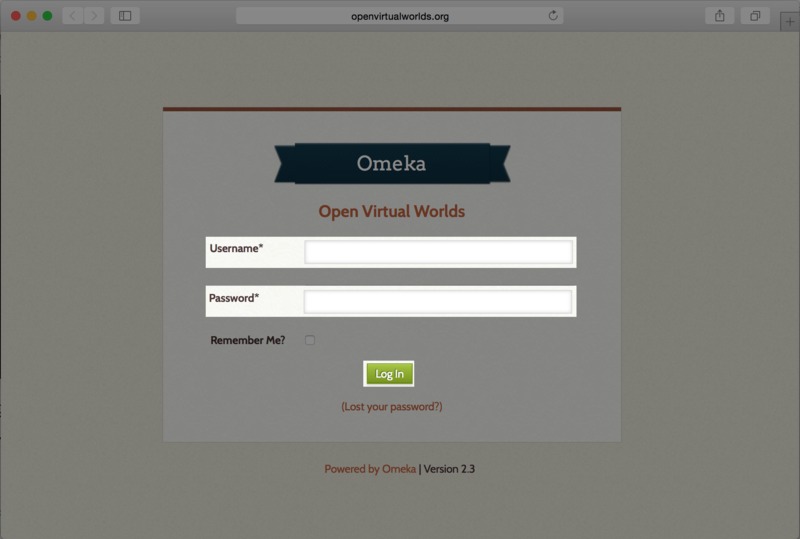
1)         Open the system created on Omeka platform, such as Open Virtual Worlds. Log in with username and password. The following is the link to log in

http://openvirtualworlds.org/omeka/admin/users/login

User Guide for photogrammetry

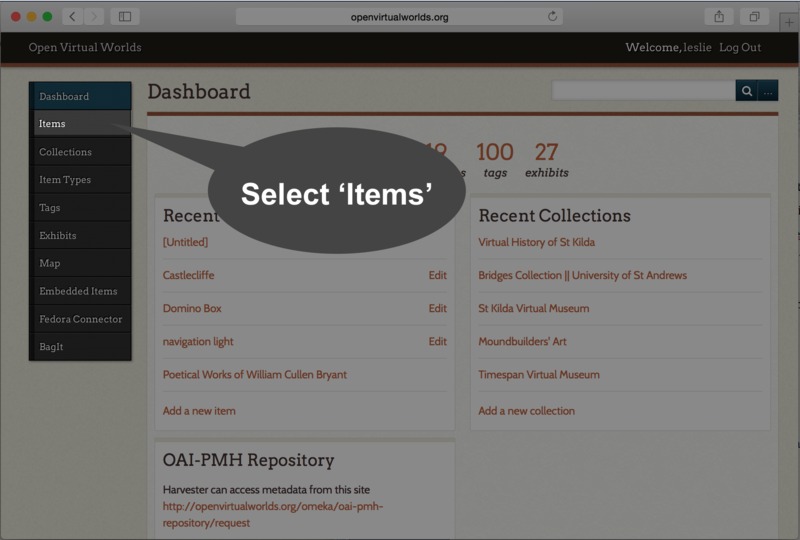
2)         Select ‘Items’ on the left side navigation bar

User Guide for photogrammetry

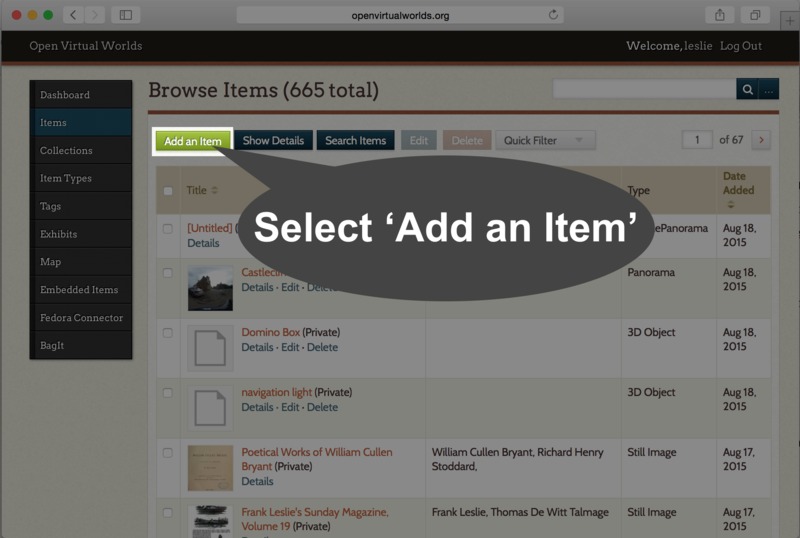
3)         Click the button ‘Add an Item’

User Guide for photogrammetry

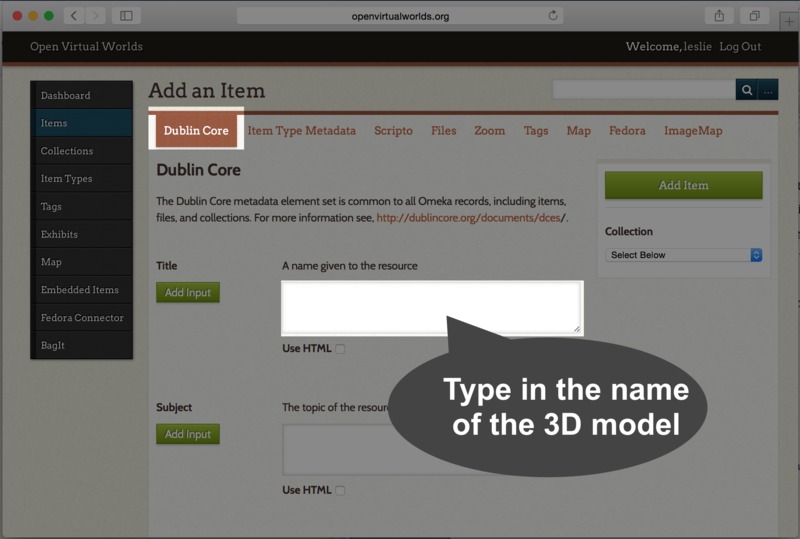
4)         Click the button ‘Dubin Core’ and type in the name of the 3D object. For example, name the 3D object as ‘a bottle of drink’

User Guide for photogrammetry

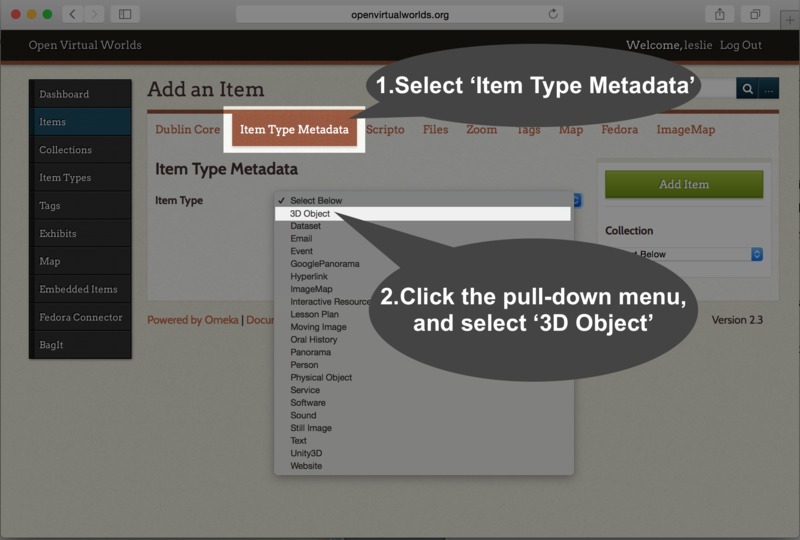
5)         Select the button ‘Item Type Metadata’, and click the pull-down menu beside ‘Item Type’, then choose ‘3D Object’

User Guide for photogrammetry

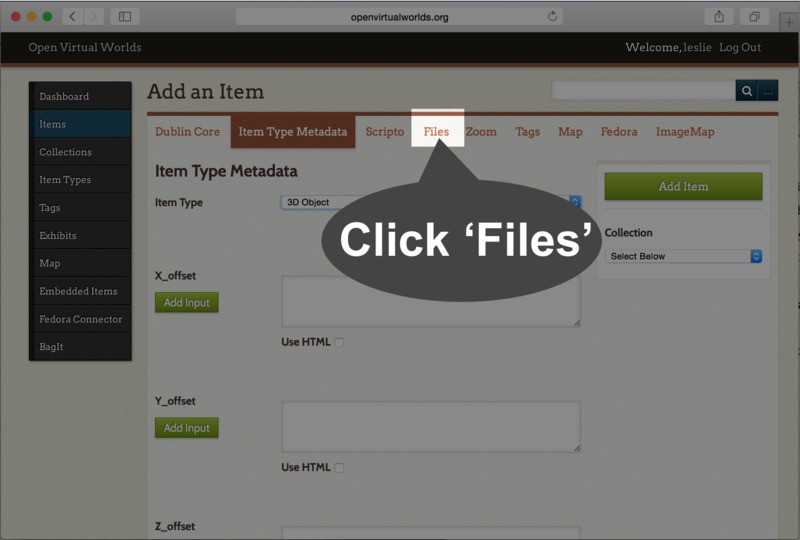
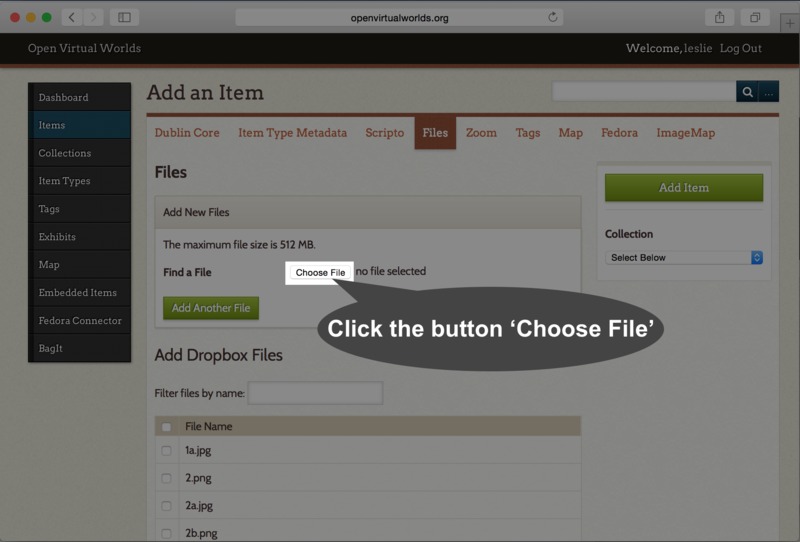
6)         Select the button ‘Files’

User Guide for photogrammetry

7)         Click the button ‘Choose File’ in the frame

User Guide for photogrammetry

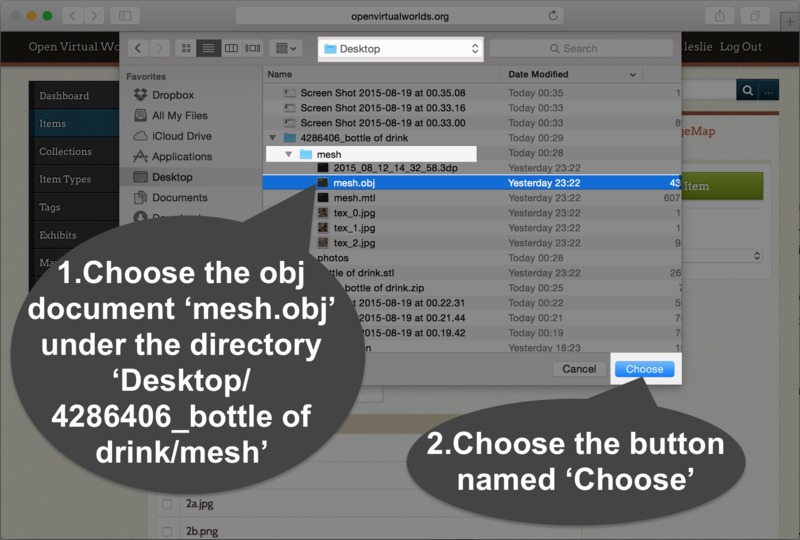
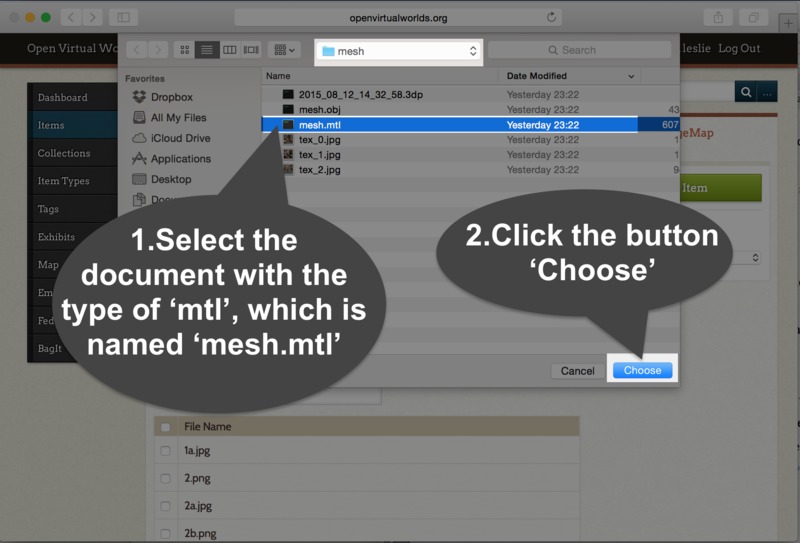
8)         Choose the decompressed file in the pop up window, and go into the file named ‘mesh’. Choose the document with the type ‘.obj’. In other words, choose the document with the suffix ‘.obj’. Then click the button ‘Choose’ in the bottom right corner in the pop up window
User Guide for photogrammetry

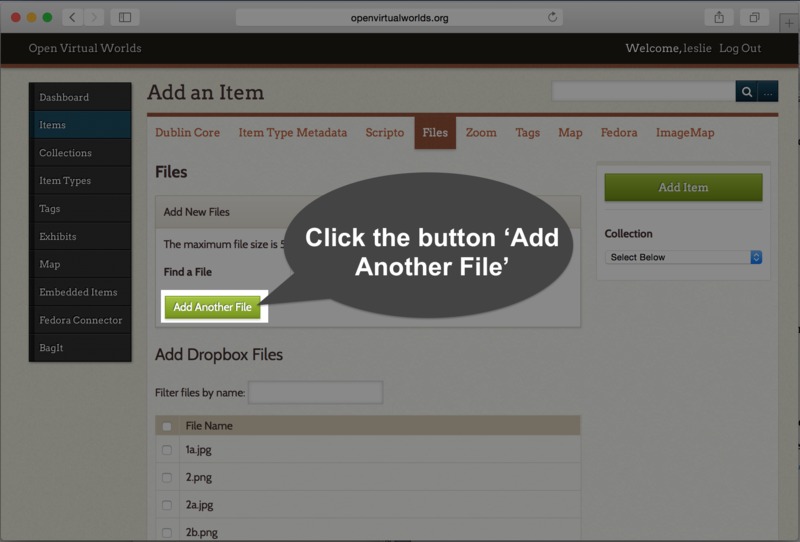
9)         Click the button named ‘Add Another File’

User Guide for photogrammetry User Guide for photogrammetry

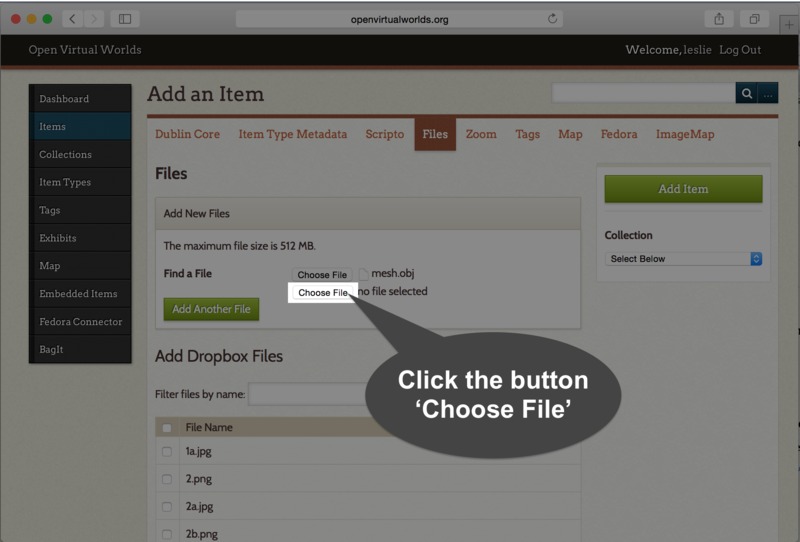
10)         Repeat the step 7 and step 8, but choose the document with the type ‘.mtl’

User Guide for photogrammetry User Guide for photogrammetry

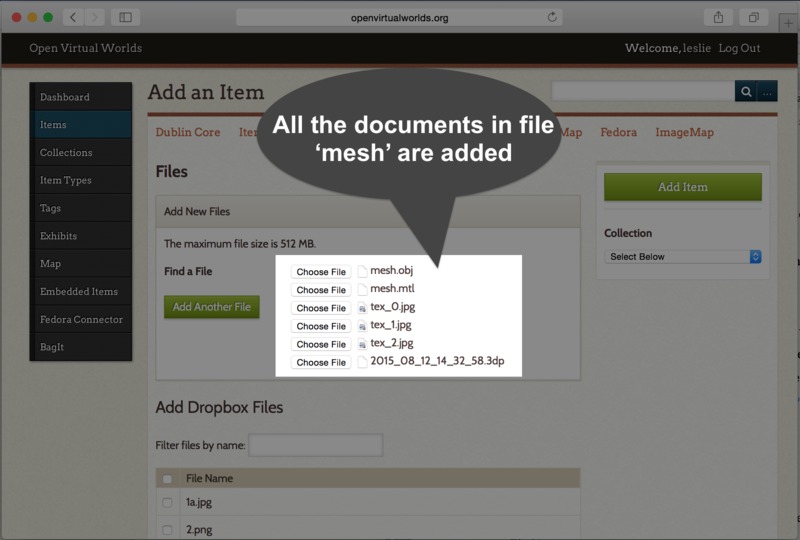
11)         Repeat the step 7 and step 8, until there is no more documents in the ‘mesh’ directory

User Guide for photogrammetry

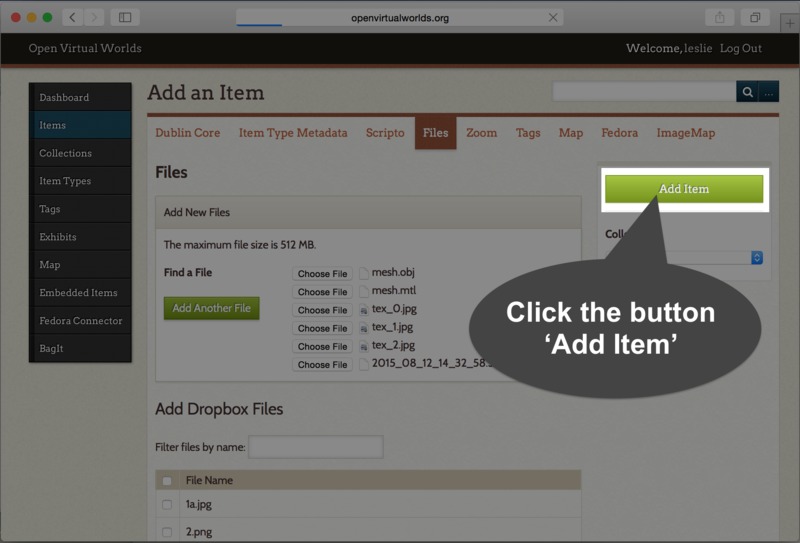
12)         Click the button ‘Add Item’ on the right side of the webpage, and wait for several minutes. During this time, do not reload or close the webpage

Create an Item with 3D models